Build Your Own Coffin
Building your own coffin (or casket) can be a rewarding experience. Use these plans to build your own coffin. Click the image below (figure 1) to download a free printable PDF version of the blueprints. This coffin can be used as a piece of furniture such as a coffee table, storage chest, or bookshelf. Perhaps you need to build a coffin for a stage prop or Halloween display. The coffin plans presented here are adequate for use in the cremation or burial of human remains.
If you're looking for more information on building your own coffin (or casket) from scratch, try reading So You Wanna Build a Casket.
Building your own coffin can reduce the consumption of precious natural resources. If you are interested in green burial or natural burial, this coffin can be built without the use of metal fasteners (screws or nails). The glued rib construction can provide a finished sturdy coffin suitable for natural burial cemeteries that require metal-free coffins.

Figure 1 - Coffin blueprints. Click on this image to download a printable PDF version of these toe-pincher coffin blueprints.
Before you begin...
Are you considering taking on the task of building a coffin yourself? Whether you take the opportunity to work by yourself or together with friends and family, crafting a coffin for a loved one can be memorable and therapeutic. When I built my first coffin for my Grandfather with the help of my father, bother, and sister, we found the experience of working together to be comforting and satisfying. We built a coffin for Grandpa that was inexpensive, sturdy, and beautiful in a traditional coffin design that expressed my Grandfather's affection for the Old West.
Your hand-crafted coffin can echo the personality of your lost loved one with a number of different finishes. For my Grandfather’s coffin we preferred the raw and natural appearance of unfinished pine in the simplest of traditions, but yours can be stained, stenciled, painted, burned, stamped, carved, or decorated with bumper stickers and photos to reflect upon the life and times of your lost loved one.
Before you begin, set your expectations for the time and material cost to build your own coffin. The coffin blueprints and assembly instructions presented here will save you considerable time and effort involved in designing and building a coffin from scratch entirely on your own. This design has been tested with up to 300 lbs and ensures that your coffin will safely transport your lost loved one for funeral and burial or cremation. If you are an experienced do-it-yourself woodworker with basic hand tools, you should plan for 8-10 hours to build your first coffin--even if you have help. As for materials, you can expect to spend between $200 and $300 depending on the market price for lumber in your area and the type of wood you choose to use. If you plan to line the inside of your coffin with pillows or linens, add this to your estimated cost of materials. Our coffin kit will save you time and money over building your own from scratch!
1. Gather tools and materials

Figure 2 - Reclaimed pine lumber from a 100 year old barn.

For a typical coffin you will need about 60 board feet of lumber. If you are purchasing 1x10 inch lumber this means you will need about twelve boards 8-10 feet long. For 8-inch or 12-inch boards you can adjust your count accordingly. We highly recommend using standard 1-inch lumber planed to an actual thickness of three quarters of an inch (0.75 in.). Thicker lumber will add unnecessary material weight and thinner will compromise on the strength and rigidity of your completed coffin. Also, 1-inch lumber is common and readily available. You will want to use a soft wood (like pine or poplar) for the low cost, light weight, and workability of the wood. However, you may opt to use a finer quality wood such as oak, ash, or black walnut for the premium wood grain and finish, but be prepared for your finished coffin to weigh 200 lbs. or more.
For this project we are using pine lumber reclaimed from a 100 year-old barn (see figure 2). Reclaimed lumber from an old barn, garage, or other source is the best way to reduce, reuse, and recycle. If your motivation is to be eco-friendly, consider searching for lumber to reclaim from an old building that is scheduled to be removed or re-sided. The old barn boards in these photos have much character and still provide all the strength found in new lumber. Another sustainable alternative to look for is lumber certified by the Sustainable Forestry Initiative (SFI), urban wood, or air-dried wood.

Figure 3 - Use Elmer's wood glue for superior holding strength.
In addition to lumber, you need to equip yourself with some Elmer's wood glue, screws (or nails), or other wood fastener system. These instructions use a traditional rib design with glue and screws for easy construction and superior holding strength of the wood joinery (see figure 3). This design also accommodates removal of the wood screws after the glue dries (about 24 hours) to meet the 100% biodegradable requirements of several natural burial and conservation cemeteries. Consider replacing the screws with wood dowels for additional strength and security.
For handles, pick up some thick cotton rope. We like cotton rope at 1-inch or 1.25-inch diameter as it provides a soft comfortable grip and adds an attractive finish to your coffin (see figure 7).
It is possible to build this entire coffin with only basic hand tools including a mallet or hammer, hand saw, tape measure, square, and a screw driver. A few power tools such as a skill saw and drill will make the job go a little faster. Of course, if you have access to a shop with table saw, joiner-planer, and power sanders the job will move along much faster.
Last, find a good space to work. A sturdy, flat table or workbench will make for a nice comfortable working environment to measure, cut, prepare, and assemble your coffin. In the photos you will see we are using a torsion box table in our workshop. Set yourself up on a table or picnic table outside if you don't have adequate garage space or access to a workshop.
2. Prepare the cut list
Prepare the following panels by measuring boards and cutting to size. Depending on the width of the boards you start with, you may need to rip (cut along the grain) to make your panels 18 inches wide--the width of the side, head, and foot panels is the height of the casket.
| Panel | Description | Dimension (inches) | Qty |
|---|---|---|---|
| Upper (Head) Side | Pair of side panels with ends cut to 10 degrees from vertical (see blueprint insets 1 and 2) | 24.375L x 18W | 2 |
| Lower (Toe) Side | Pair of side panels with ends cut to 6 degrees from vertical (see blueprint insets 2 and 3). | 56.375L x 18W | 2 |
| Top (Lid) | Cut head angle at ~10 degrees and toe angle at ~6 degrees. Measure 24 inches from top and mark widest points; then trace lines to head and toe. | 80L x 26W | 1 |
| Head End | Cut outside ends of end panel at 10 degrees from vertical. The narrowest (outside) length should be 16 inches. | 16L x 18W | 1 |
| Toe End | Cut outside ends of toe panel at 6 degrees from vertical. The narrowest (outside) length should be 12 inches. | 12L x 18W | 1 |
| Floor Panel | Floor panel consists of a series of boards cut to length at 24 inches or less. Start with a 24 inch board for the widest part of the floor and cut top corners at 10 degrees and bottom corners at 6 degrees. | 78L x 24W | 1 |
| Bottom Rails | Use scraps from ripping side boards to width. Anything from 1.5 to 3 inches will do just fine. |
53L x 2W 20L x 2W |
2 2 |
| Vertical Ribs | Use scraps... anything from 1.5 to 3 inches wide. |
14L x 2W |
12 |
| Lid Rips | Plan for four ribs; one at each end (head & toe) and two in the middle. |
16L x 2W 24L x 2W 20L x 2W |
2 1 1 |
| Floor Rib | When finished with the floor, turn the casket over and add a rib that ties together all of the floor boards. |
78L x 2W |
1 |
| Joiner Ribs | Start with a ~30-inch 1x4 and rip the 10- and 6-degree angles (see Figure X) and then cut a pair of at 14 inches in length. | 14L x 4W | 1 |
The overall dimensions of this finished coffin are 80 inches long by 26 inches wide (at the widest part) and 18 inches deep.
Notice this coffin is 18 inches deep--a little deeper than most coffins. Average coffin depth is 15 to 16 inches. These are the original plans I drew for my Grandfather's coffin. We had planned to add 4-6 inches of pillows and cushions to the bottom. And Grandpa was buried in his cowboy boots which were just over 12 inches long! So, we made his coffin a full 18 inches deep less the depth of the floor to make sure there was enough room. You can easily adjust these plans and build yours 15 or 16 inches deep without any issue.

This coffin was made from reclaimed barn wood.
Drill holes for the rope handles in the lower most boards on all sides. You want to prepare holes for three handles on each side, one handle at the head, and one handle at the foot. Drill the holes next to where the ribs will be placed so the rope handles will wrap the ribs in the inside of the coffin for improved strength and weight transfer from the handles to the coffin. The holes should be the same size as your rope for a tight fitting handle. Drill the holes approximately 4 inches from the bottom edge of the coffin to keep the handles in the bottom board of your coffin.
3. Attach the floor frame rales to the sides

Figure 4 - Floor frame rails attached to the lower board of all four side panels.
You should now have all the boards cut and ready to make six side panels including a head panel (16x18), a toe panel (12x18), two long (toe) side panels (56.375x18), and two short (head) side panels (24.375x18). We will attach a 1x2 to the bottom edge of all size side panels. This member will serve as the floor support for the casket transferring the weight on the floor to the sides of the casket in a shear plane (vs. a tension joint) adding strength of the coffin. These rails need not extend all the way to the outside edges of each side panel--each rail should be 1-2 inches short at each end to leave clearance room for the vertical ribs on the adjacent side panel. Particularly at the middle joint between the head (short) and toe (long) panels you will want to leave at least 2 inches to make room for the 4-inch joiner rib.
4. Assemble the side panels and lid
Starting with the lid, fasten together the long boards that make up the lid with 2-inch ribs and glue. Use 4 ribs to assemble the lid placing one rib 1-inch from the head and toe ends of the lid and the remaining 2 ribs evenly spaced in between. Use glue and screws to secure the ribs. If preferred, you can remove the screws from the ribs after the glue dries--let the glue cure for 24 hours before removing the screws.
In a similar fashion, assemble the 6 panels that make up the sides, head, and foot of the coffin using ribs, glue, and screws. The following are some tips to follow while constructing the side panels.
Try to use the same board for both lower head and toe boards and upper head and toe boards on side panels so that the same board widths and wood grain match at the elbow where the coffin bends.
When you attach ribs to the side panels, carefully position the ribs at the far ends (to leave room for the head and foot panels) back from the edge the same distance as the thickness of your boards (about 3/4 of an inch). Use a piece of scrap as a spacer while you attach the ribs.
Leave room between the lower end of each rib and the floor frame rails for the floor boards to fit. Unless you intend to run the boards through a joiner-planer for a perfect smooth edge, there is no need to glue the edge of the top and bottom boards for the side and end panels. The ribs will provide enough strength without edge gluing the side panels. If you use screws and glue to join the ribs, you can remove the screws after the glue dries--after about 24 hours.
5. Assemble the floor and sides
The next few steps will require some patience. A few extra hands will serve well. Starting at the narrowest part of the coffin at the toe-end of the long (lower) side panels, secure the toe panel to both of the sides of the coffin. Next we will cut a special floor board that will join the toe end of the coffin with the head end. First cut a board exactly 24 inches long. Then from the middle of each end cut angles using approximately 6 degrees for the toe angles and 10 degrees for the head angles. The longest part of the board from end to end should still be 24 inches. Position this board where the toe and head ends of the coffin will join together and fix into place with glue and screws or nails. This floor board along with the joiner ribs will secure the head end and toe ends of the casket together.
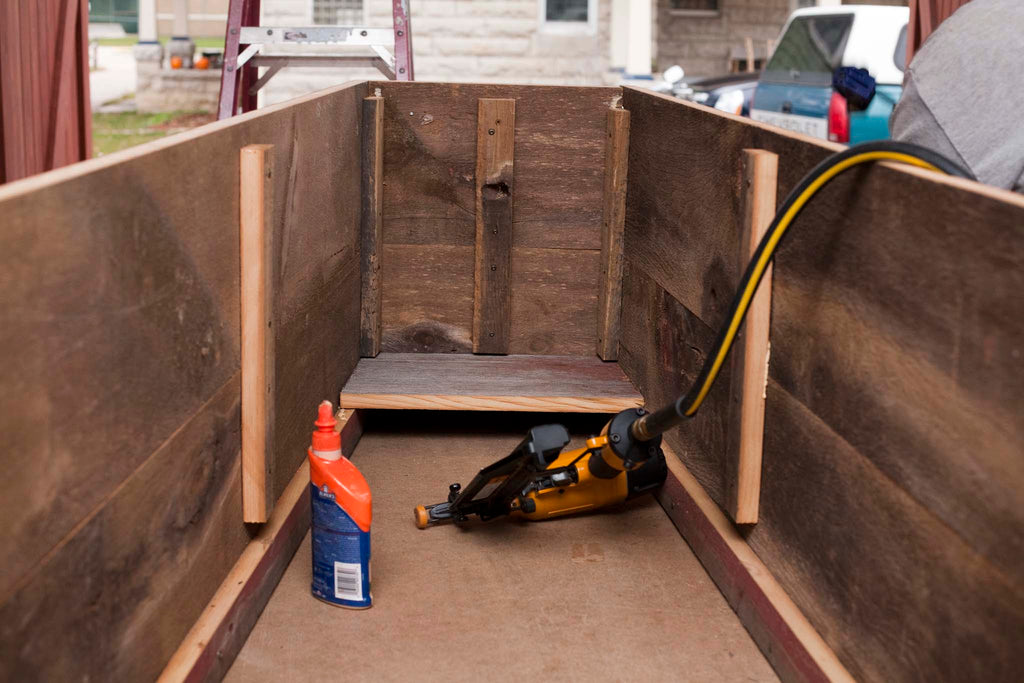
Figure 5 - First floorboard installed a the toe end of the coffin.
Next cut a trapezoid shaped floor board with cuts at approximately 6 degrees. The narrow side should be slightly more than 12 inches long. The same as the inside length of the toe panel (see figure 5). Take note of the length of the long side of the board you just cut--this will be the same length as the short side of the next floor board. Position the floor board and secure to the floor frame rails with glue and screws (or nails). Next, working from the toe-end toward the middle, secure the remaining floor boards in place. You should now have the lower (toe) end completed. Continue in similar fashion to secure the head panel and side panels.
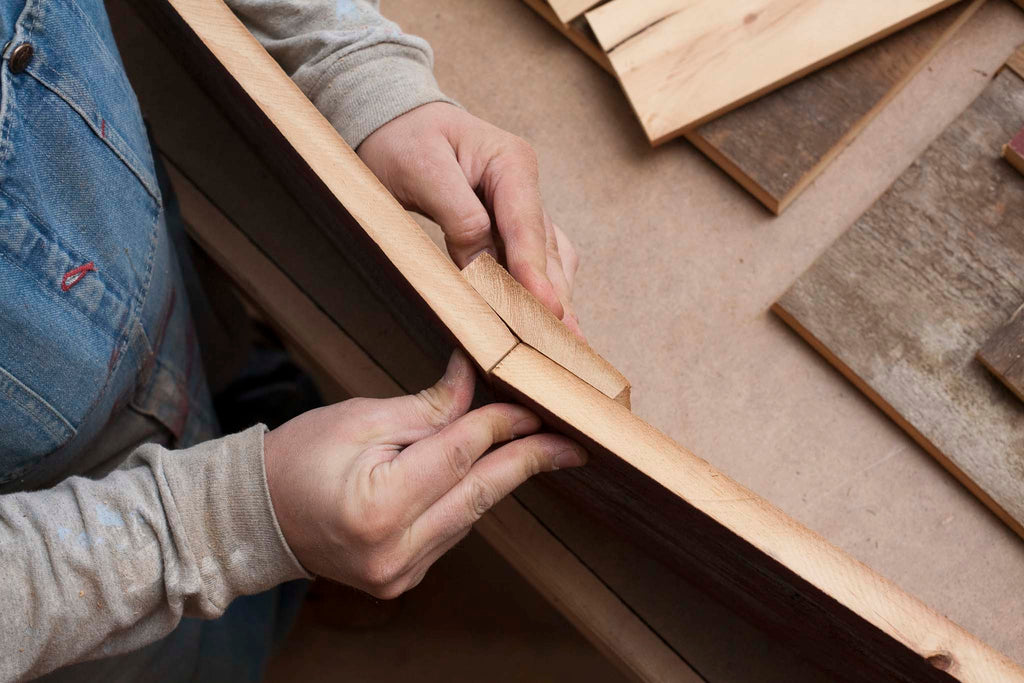
Figure 6 - Use a table saw to cut the 6-degree and 10-degree angles on the joiner rib at the "elbow" of the coffin sides.
To complete the assembly of your coffin, add the 4-inch wide joiner ribs at the angle joint between the head and toe parts of the coffin. Use a table saw to cut an angle from these ribs as shown in figure 6. Six degrees for the toe and 10 degrees for head side. Last, flip the coffin over and add a rib joining the floor boards together over the length of the coffin. You have now completed the assembly of the coffin. Proceed to the next step to add the rope handles.
6. Install rope handles

Figure 7 - Natural cotton rope handles are soft and comfortable to carry.
Take 20 feet of rope and tie a secure single knot in one end. Starting in a corner on the inside of the coffin, feed the rope through one of the handle holes. Feed the rope back into the casket exposing a 20 inch long handle on the outside of the casket. Proceed to the next hole and repeat.
Notice that on the inside of the casket, the rope tightly wraps around the side ribs and corner ribs. As you lace the rope, pull it as tight as you can--the long handles will have plenty of stretch for a nice comfortable grip on the casket. When you get to the final handle, tie a tight knot again to keep the rope from slipping out. When finished, there should be 3 long handles along both sides of the coffin, 1 handle on the Head, and 1 very short handle on the Foot for a total of 8 rope handles.
7. Finishing touches
You can personalize your coffin with stain, paint, or other decorations. Be creative. You can decorate your coffin in any way you choose.
Securing the lid for burial is optional--some people do not secure the lid in place for burial (it won't go anywhere). If you prefer, there are several ways you can secure the lid of the coffin prior to burial. The easiest method to secure the lid is with 6-10 finish nails no more than 1.5 inches long. You could also use small wood screws (trim screws), but we recommend you to drill pilot holes to prevent the lid from splitting. Some people prefer to pre-drill holes and use wooden pegs to secure the lid for burial. For a burial in a natural burial cemetery, you may be required to use wooden pegs instead of metal screws or nails to secure the lid.